Image courtesy of Scryfall.com
Red-Black Mana Fixing with Hazoret
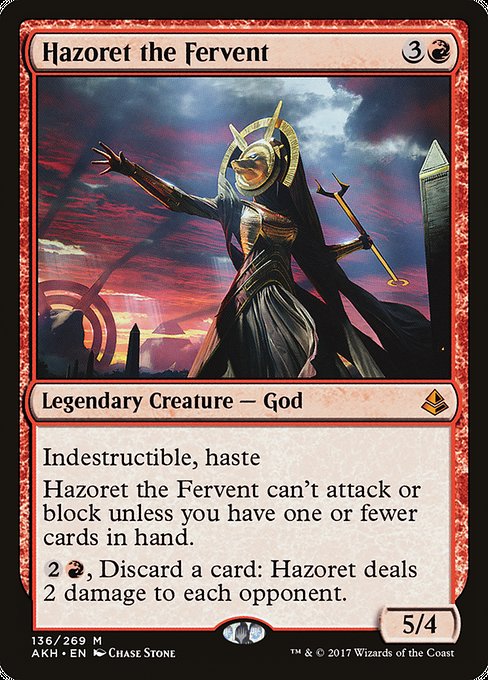
Hazoret the Fervent lands with a roar in red, but her presence often spurs a Rakdos-flavored strategy that pairs the heat of {R} with the bite of {B}. In a two-color shell like red and black, mana fixing isn’t just about hitting the right colored lands—it’s about fitting Hazoret into the curve while keeping your hand fresh enough to unleash her devastating push. This God of the Amonkhet desert thrives on speed and pressure, yet her built-in hand-size clause rewards careful mana planning and a touch of calculated risk 🧙♂️🔥.
At 4 mana (a cost of {3}{R}), Hazoret wants to land by the early-mid game to swing early or threaten a devastating attack. The trick is to assemble a mana base that reliably produces red and black without compromising tempo. You’ll see a lot of interplay between fast fixing and sturdy rocks, because Hazoret doesn’t arrive alone—she comes with a mandate to pressure your opponents while you manage a delicate balance of drawing and discarding. The result is a deck that feels like a fiery duel between appetite and calculation, where each land drop counts like a spark that could ignite a chain reaction ⚔️🎲.
Practical mana options for a Rakdos-leaning shell
Red-black fixing shines when you mix fast mana accelerants with reliable color sources. Here are approaches that fit Hazoret’s demand for speed while keeping the color rails intact:
- Rakdos Signet — A classic two-color rock that taps for {R}{B}. It smooths your early turns and helps you hit Hazoret on-curve, especially when your hand size is precarious. Embrace the tempo. 🔥
- Fellwar Stone — A colorless fix that often pays off for red and black decks, since it can generate mana of the colors you’re already leaning on depending on the battlefield. This is the kind of flexible artifact you want when you’re weaving a two-color plan around a big payoff threat.
- Sol Ring and other colorless rocks — Sol Ring and Mind Stone don’t care about your colors, which lets you accelerate toward Hazoret even when your mana base isn’t fully online yet. They’re the glue that keeps your opening hands aggressive rather than stranded. 💎
- Fetch lands and Shock lands (Blood Crypt, Dragonskull Summit, Sacred Foundry equivalents in your playgroup) — These provide the dual functionality of fixing colors and pressuring life totals. In a RB shell, taking a swing on life for a turn two or three can pay off in a big late-game payoff if Hazoret hits the table smoothly. Heed the life-cost caveat—this is where your tempo must stay just on the edge of reckless and righteous 😤.
- Duals and Fetch/Shock synergy — Cards that fetch or tutor for the right basic land types help you assemble the exact mana you need on turn four and beyond, letting Hazoret join the board with minimal delay. The goal is to shave off awkward turns where you’d otherwise be stuck with a capital “R” or “B” symbol you can’t spend.
- Chromatic options and color-tuning lands — Lands and rocks that offer splashes of color or colorless mana with later conversion keep you from drowning in mana mistakes as you chase Hazoret’s high-impact turns 🎨.
Hazoret’s crown jewel is not just her raw power but how she rewards decisiveness. The card’s ability to discard a card to pump out 2 damage to each opponent is a detonator for clutch finishes when you’ve kept the board under control and your life total in a fragile but survivable place. The moment you reveal a clean hand into a robust mana base, Hazoret can swing the game in a heartbeat—yet there’s a catch: you must actively manage your hand to stay eligible to attack. This creates a delicious tension between rushing threats and saving just enough gas to keep Hazoret threatening on the battlefield 🧙♂️⚡.
Building around Hazoret: pacing, risk, and rhythm
In a RB strategy, you lean on pressure and purpose. Your mana base is the stage where rhythm and tempo meet raw power. The most successful Hazoret shells use a mix of fast rocks, efficient fixing, and a few lines of disruption to ensure you can keep pressure while avoiding the dreaded “dead draw” hands. Because Hazoret’s attack eligibility scales with hand size, you’ll often run a lighter draw strategy that still keeps a steady cadence of red and black sources. The payoff is dramatic: Hazoret not only arrives with impact but also carries a threatening reminder that you’re willing to pay costs to stay in the game. And when you pair that with a reliable mana base, you’re setting up a win-rate scenario that feels both familiar and thrillingly ruthless 🧙♂️🔥.
“Red-fire, black-ink, and a heart that burns for victory.” Hazoret’s flavor reads like a battle cry in a desert storm—harsh, relentless, and perfectly tuned for a high-velocity Rakdos plan.
For collectors and lore enthusiasts, Hazoret the Fervent embodies the bold, relentless agony and triumph of Amonkhet’s desert gods. Her mythic rarity and the dramatic art by Chase Stone make her a centerpiece for many players’ decks, and the modern pricing—roughly a few dollars for nonfoil and a few dollars more for foil—speaks to her enduring appeal. The design balances a formidable stat line (5/4) with the strategic complexity of “hand management,” which remains a talking point among commanders who love to push the envelope with risk-reward decisions 🧭💎.
When you’re ready to explore more ways to power Hazoret, consider learning from cross-promotional resources around the network. The synergy between a blazing red-beat plan and careful black-mix control invites careful tuning and experimentation, which is part of the fun of MTG’s multiverse—the constant discovery of new lines of play and fresh finishes for your favorite mythic threats 🔥🎲.
Phone Click-On Grip Back of Phone Stand HolderMore from our network
- https://articles.digital-vault.xyz/blog/post/pubg-battlegrounds-dev-interview-highlights-and-insights/
- https://blog.digital-vault.xyz/blog/post/blue-white-giant-in-sagittarius-reveals-low-metallicity-clues/
- https://blog.digital-vault.xyz/blog/post/hot-blue-giant-in-scorpius-on-the-color-magnitude-diagram/
- https://blog.digital-vault.xyz/blog/post/lessons-from-a-10000-light-year-hot-blue-giant/
- https://crypto-acolytes.xyz/blog/post/temperature-and-brightness-sculpt-the-hr-diagram-of-a-hot-blue-star/